

Inspect Before Every Walk: Leather Dog Collar Care for U.S. Owners
A quick weekly wipe with a damp microfiber cloth, a gentler monthly cleaning, and conditioning every few weeks keep a leather collar strong and supple for years. Never soak the leather, always air-dry it away from heat, and check the buckle and D-ring before every walk. Stick to safe anchors like saddle soap, a quality leather conditioner, and well-built hardware from a brand like Americanbarkbliss, and you’ll avoid nearly every problem that sends collars to the trash early.
TL;DR:
- Use a penetrating leather conditioner every two to six weeks depending on the dog’s activity level to maintain flexibility without weakening the leather.
- Always dry a collar at room temperature and avoid direct heat or sunlight to prevent warping and surface cracking.
- Check hardware and stitching regularly, replacing rusted or frayed parts immediately to ensure safety and longevity.
- Clean weekly with a damp microfiber cloth and perform a deep monthly clean with saddle soap to prevent dirt buildup and deterioration.
- Avoid soaking or using harsh chemicals like dish soap or silicone sprays, which damage the leather and attract dirt over time.
Table of Contents
- What You Need for Leather Dog Collar Care
- How Do You Clean a Leather Dog Collar Step by Step?
- How Often Should You Condition a Leather Collar?
- Drying and Storing a Leather Collar the Right Way
- A Simple Weekly and Monthly Maintenance Schedule
- Checking Buckles, D-Rings, and Stitching for Wear
- Getting Rid of Odors and Stains Without Ruining the Leather
- When to Repair a Leather Collar and When to Replace It
- Why This Leather Dog Collar Care Advice Holds Up
- Why Durable Hardware Changes the Whole Care Equation
- Grooming and Maintenance Gear Worth Adding to Your Routine
- Sources
- FAQ
What You Need for Leather Dog Collar Care
You don’t need a workshop full of gear. A short shopping list covers almost every situation you’ll run into with a leather collar.
- Microfiber cloths (two or three): one for cleaning, one for buffing, since microfiber lifts dirt without scratching the surface.
- A soft-bristle brush or an old toothbrush for grit in seams and around hardware.
- Saddle soap or a pH-neutral leather cleaner for monthly deep cleaning.
- A penetrating leather conditioner, not a surface wax, for restoring oils.
- Lukewarm water and a small bowl for diluting cleaner.
- A dry towel for blotting excess moisture.
Skip anything with dish soap, bleach, petroleum distillates, silicone spray, or cooking oil. Dish soap strips natural oils out of the hide the same way it strips grease off a pan, which sounds useful until you realize leather needs those oils to stay flexible. Silicone sprays and cooking oils sit on top of the leather instead of feeding it, and they can attract dust or turn rancid over time. For hardware, keep a small stiff brush on hand and a little white vinegar for light surface rust. A clean, lint-free cloth finishes the job by buffing metal back to a shine.
How Do You Clean a Leather Dog Collar Step by Step?
Cleaning a leather collar isn’t complicated, but the order of operations matters. Rushing it, or skipping the pre-check, is how people end up with cracked leather or loosened stitching.
Pre-check first. Remove any ID tags, detach the leash clip if possible, and dry-brush loose dirt and hair off the surface. This step alone prevents you from grinding grit into the leather once it gets wet.
- Wipe weekly. Dampen a microfiber cloth with plain water, wring it out well, and wipe the collar in small circular motions. This is basic upkeep, not a deep clean, so keep it fast and light.
- Deep clean monthly. Mix a small amount of saddle soap or a pH-balanced leather cleaner with lukewarm water. Apply sparingly with a damp cloth, working in circles rather than back-and-forth scrubbing.
- Remove residue. Use a second clean, damp cloth to lift off any leftover soap. Rinse the cloth often so you’re not just smearing dirty water around.
- Pat dry immediately. Blot with a dry towel. Don’t rub hard, especially near stitched seams.
The biggest mistake in this whole process is treating leather like a countertop. Never soak the collar, never use hot water, and never scrub hard at the stitching. Hot water opens the leather’s pores too aggressively and can cause fibers to shrink unevenly, while soaking lets water work into layers of leather that were never meant to get fully saturated. Scrubbing at stitching frays thread that’s often harder to replace than the leather itself.
Pro Tip: Keep a second microfiber cloth strictly for buffing after conditioning. Using your cleaning cloth for both jobs just reapplies the grime you spent ten minutes removing.
How Often Should You Condition a Leather Collar?
Conditioning restores oils that washing and daily wear strip out, but more isn’t better here. The goal is flexibility, not shine.
Look for a penetrating conditioner rather than a coating wax. Penetrating formulas soak into the hide and restore the fats and oils that keep collagen fibers flexible, while surface waxes just sit on top and can trap moisture underneath. Skip anything petroleum-based, since it tends to sit on the surface rather than absorb, and it can leave a greasy film that attracts dirt.
To apply conditioner correctly:
- Use a pea-sized amount, no more, worked in with your fingers or a soft cloth.
- Rub it in with small circular motions, covering the whole collar evenly.
- Let it sit for 10 to 30 minutes so it actually absorbs instead of just sitting on top.
- Buff off any excess with a dry cloth so the collar doesn’t feel tacky.
Most leather collars only need conditioning every few weeks under normal conditions. If your dog swims regularly, lives somewhere hot and dry, or spends a lot of time near saltwater, shorten that window to every two to four weeks. Watch for signs you’re overdoing it: a sticky surface, a noticeably darker color change, or leather that feels mushy instead of supple. Over-conditioning can soften the hide too much and actually weaken its structure over time, which is exactly why cooking oils are such a poor substitute. Cooking oils can go rancid, do not penetrate evenly, and can attract mold in humid storage.
Drying and Storing a Leather Collar the Right Way
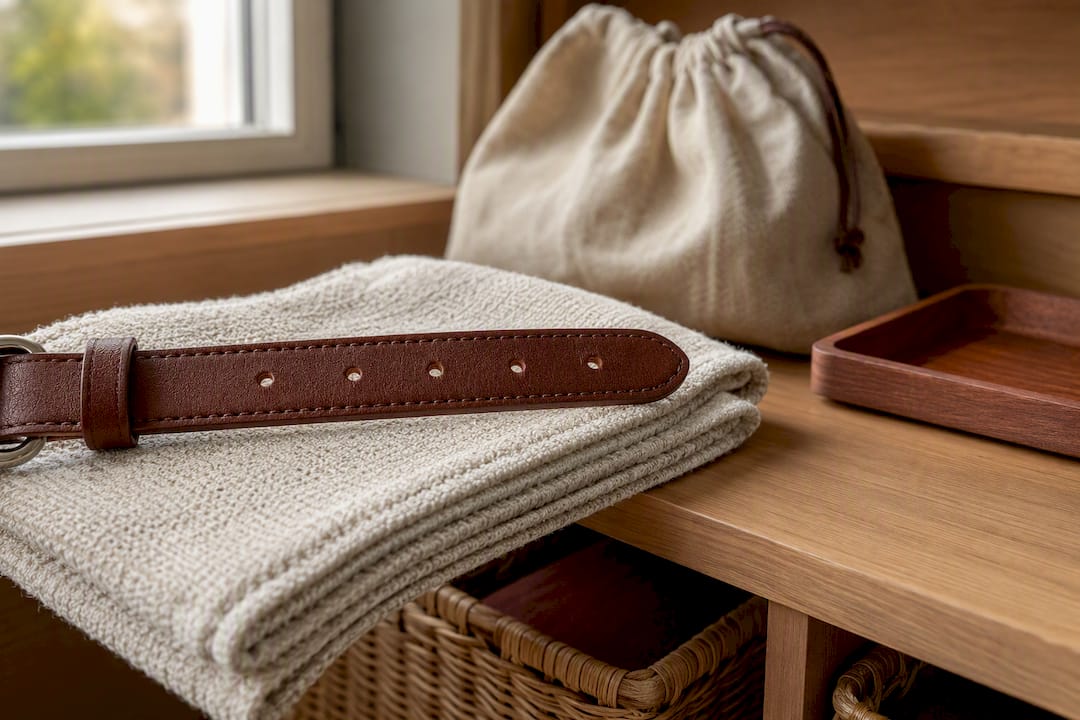
How you dry and store a collar between uses matters almost as much as how you clean it. This is where a lot of otherwise well-cared-for collars get ruined.
Pat the collar dry with a towel first, then let it air-dry flat at room temperature. Resist the urge to speed things up with a hair dryer, a radiator, or direct sunlight on a windowsill. High heat causes the collagen fibers in leather to contract, which is what leads to warping, shrinking, and the kind of surface cracking that never fully goes away.
- Lay the collar flat or drape it loosely over a rod, never hang it while wet, since gravity will stretch damp leather out of shape.
- Store dry collars somewhere cool and breathable, not sealed in a plastic bag or airtight container where trapped moisture can encourage mold.
- If you have more than one collar, rotate them so each gets a full day or two to dry out completely between uses.
- After a swim in the ocean or a chlorinated pool, rinse the collar with fresh water right away, dry it fully, then condition it once it’s completely dry.
Pro Tip: If your dog swims often, keep a backup collar in rotation. Giving leather a full 24 to 48 hours to dry out between uses does more for its lifespan than almost any cleaning product you could buy.
A Simple Weekly and Monthly Maintenance Schedule
You don’t need a calendar reminder for every step, but a loose rhythm keeps you from either neglecting the collar or fussing over it too much.
- Weekly: Quick wipe-down with a damp cloth, plus a glance at the buckle and D-ring for obvious wear.
- Every 4 to 6 weeks: Deeper clean with saddle soap or leather cleaner, followed by a light conditioning pass once the leather is dry.
- More often for active dogs: Swimmers, beach regulars, and dogs in hot or dry climates often do better on a two to four week conditioning cycle instead.
- After heavy water exposure: Rinse with fresh water, dry fully, then condition, regardless of where you are in the regular schedule.
This rhythm is forgiving. Missing a week here or there won’t ruin a well-made collar, but stretching months between any care at all is how leather dries out, stiffens, and eventually cracks at the fold points.
Checking Buckles, D-Rings, and Stitching for Wear
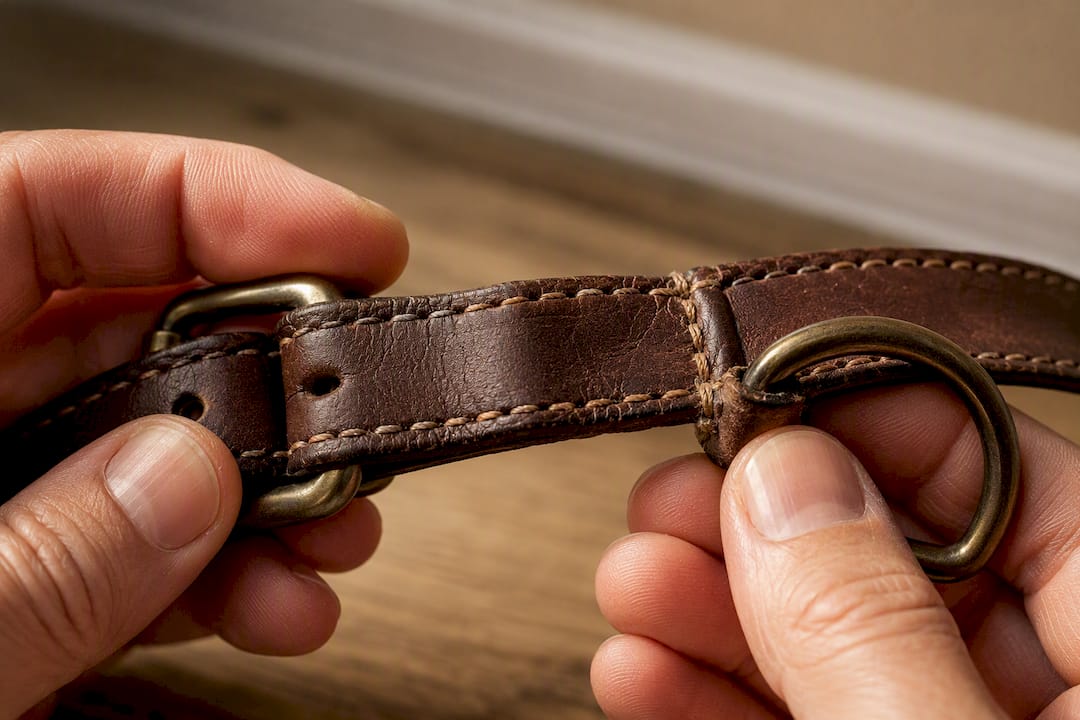
The leather usually isn’t what fails first on a collar. Hardware and stitching tend to go before the hide does, and they’re also the parts most tied to your dog’s safety.
Run your fingers along the stitching every few weeks, feeling for fraying threads or loose loops. Check the holes where the buckle prong sits, since repeated use can stretch them out until the buckle no longer holds securely. Look closely at the leather right around metal hardware, too. That’s often the first place cracking shows up, because moisture gets trapped at the leather-metal interface and accelerates wear from underneath.
- Brush grime out from under buckles and D-rings with a soft brush, then dry the area fully.
- Buff metal hardware with a dry cloth to keep it from dulling or corroding.
- Treat light surface rust with a dab of vinegar on a cloth, then brush and dry; replace hardware that’s heavily corroded rather than trying to save it.
- Test the buckle and D-ring by hand before every walk, especially if the collar has seen recent heavy use.
Getting Rid of Odors and Stains Without Ruining the Leather
Leather absorbs odors more readily than synthetic materials, which is part of what makes it comfortable but also what makes smells stick around.
For surface-level odor, a saddle soap cleaning often does the trick, since it lifts oils and grime sitting in the pores rather than just masking the smell. A light vinegar-and-water wipe can help with lingering odor too, applied sparingly and buffed dry afterward. Our guide to removing dog collar smell walks through a few more targeted fixes if the basic clean isn’t cutting it.
If the smell persists after a proper clean, that usually means the odor has worked its way into the leather itself, not just sitting on the surface. Soaking the collar to chase that smell out tends to backfire, since it swells the hide fibers and can trap the contaminants even deeper rather than releasing them.
For stains, spot-clean gently and always test any product on a hidden section first. Avoid solvents and bleach entirely. If a stain won’t budge after one or two gentle attempts, a professional leather repair shop is a better bet than repeated at-home treatments that risk damaging the hide further.
Pro Tip: If a collar still smells after a full cleaning and conditioning cycle, don’t keep trying. A persistent smell after proper care is usually a sign it’s time to retire the collar, not clean it again.
When to Repair a Leather Collar and When to Replace It
Not every worn collar needs to go in the trash, but some damage isn’t worth gambling on.
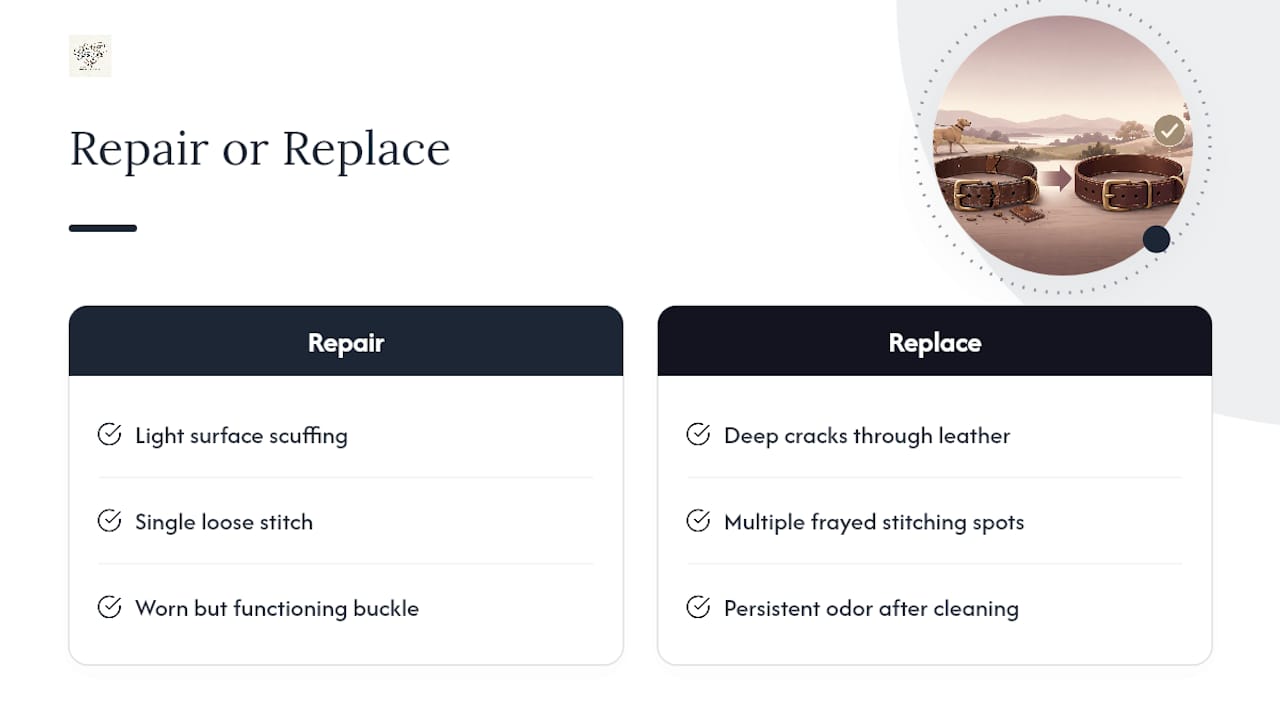
Replace the collar if you see deep cracks running through the leather, stitching that’s frayed through in multiple spots, or an odor that won’t lift after a real cleaning attempt. These are structural problems, not cosmetic ones, and a collar failing mid-walk is a real safety risk.
Smaller issues are often fixable. A single loose stitch, a worn buckle that still functions but looks tired, or light surface scuffing can usually be repaired or touched up without replacing the whole collar. The rule of thumb: if the leather’s core structure is intact and it’s just surface wear, repair is reasonable. If you’re staring at the collar wondering whether it’ll hold, don’t wait to find out on a walk. Replace it.
Why This Leather Dog Collar Care Advice Holds Up
This routine comes from years of Americanbarkbliss building leather goods for dogs, paired with practical guidance drawn from established leather-care resources. Christopher, who contributes care content for the site, put this piece together by combining that product knowledge with the cleaning and conditioning steps leather specialists consistently recommend.
Design plays a bigger role in maintenance than most people expect. A collar built with solid stitching and quality hardware simply needs less intervention over its lifespan, because there’s less for moisture and wear to exploit. For more on how construction choices affect long-term durability, see our breakdown of design and fit in dog collars.
Why Durable Hardware Changes the Whole Care Equation
We build collars around stitching and hardware that hold up under real use, because a collar that needs constant babying isn’t actually built well. Solid rivets and reinforced seams mean fewer surprises months down the line.
One practice worth stealing from our own product testing: check the collar the same way you’d check your dog’s leash clip, by hand, before you head out the door (Izdelki for pse - pet supplies listing). It takes five seconds and catches problems before they become an incident.
Keep the routine simple and stick to it. Your dog won’t notice the extra care, but you’ll notice the collar still looking and functioning like new a year or two in.
— Christopher
Grooming and Maintenance Gear Worth Adding to Your Routine
Good technique only gets you so far without the right tools on hand. The Country Living All-in-One 3-Piece Dog Grooming Kit rounds out a collar-care routine nicely, since general grooming tools keep dirt and oils off your dog’s coat before they ever transfer onto the leather in the first place.

If you’re assembling a proper maintenance kit rather than buying pieces one at a time, THE TOOL KIT bundles the essentials for hardware upkeep and general pet-gear maintenance in one place. And if your current collar is past saving, whether the stitching finally gave out or the leather cracked beyond repair, Americanbarkbliss builds replacements with the same reinforced stitching and solid hardware this whole guide is built around. Browse the full lineup at Americanbarkbliss and pick a collar that’s designed to need less of the routine you just read, not more.
Sources
- How to Clean and Maintain Leather Dog Collars: A Step-by-Step Guide
- Leather Dog Collar Care: Cleaning, Conditioning, and Common Mistakes
- How to Care for a Leather Dog Collar | 7 Easy Steps (2026)
- How to Clean Leather Collar: A Step-By-Step Guide – Andar
FAQ
What Is the Best Thing to Condition Leather With?
A penetrating leather conditioner works better than a surface wax because it absorbs into the hide and restores flexibility instead of just coating the top. Avoid petroleum-based products and cooking oils, since neither penetrates evenly or holds up over time.
How Do You Break In a Leather Dog Collar?
Wear and light flexing over the first couple of weeks softens most leather collars naturally, and a very light conditioning pass can speed that up slightly. Skip heavy conditioning early on, since new leather needs less help than older, drier hide.
Is It Okay to Use Dawn Dish Soap on Leather?
No. Dish soap is formulated to strip oil and grease, which means it also strips the natural oils leather needs to stay flexible, leaving it dry and more prone to cracking. Stick with saddle soap or a pH-neutral leather cleaner instead.
How Can I Get Rid of a Smelly Leather Dog Collar?
A saddle soap clean followed by a light vinegar-and-water wipe handles most surface odors. If the smell comes back after a proper cleaning and drying cycle, the odor has likely soaked into the leather itself, and replacing the collar is usually the safer call over repeated soaking.
Leave a comment